Is it that time of the year when you need to mark the whole class of students as graduated? Or, multiple students have enrolled in your school and now you need to distribute them to different classes? Well, feel your concern. To make these things easier for school management, we've created a simple way of managing student enrollments and defining enrollment statuses.
Usually, before the beginning of a new academic year, school administration is dealing with newly enrolled students and graduated students. In SchoolMind you can easily manage those with the Manage Enrollments feature of the Institution module.
Basically, in SchoolMind, there are three options when managing enrollments: manage enrollment statuses, manage grade enrollments, manage class enrollments. Below we'll how each of these work:
Managing Enrollment Statuses
Here you are defining the student statuses; usually, the statuses of students who have graduated or transferred to another school. Let's see below how to do that.
1. Navigate to Institution > Manage Enrollments > Manage Enrollments Statuses.
2. At the top, use the selectors for the institution, academic year, grade, and class options. That way you'll get the class you need.
3. Now, for each student set the status to either Enrolled, Graduated, or Transferred.
4. After setting the statuses for students, click the Save button.
Managing Grade Enrollments
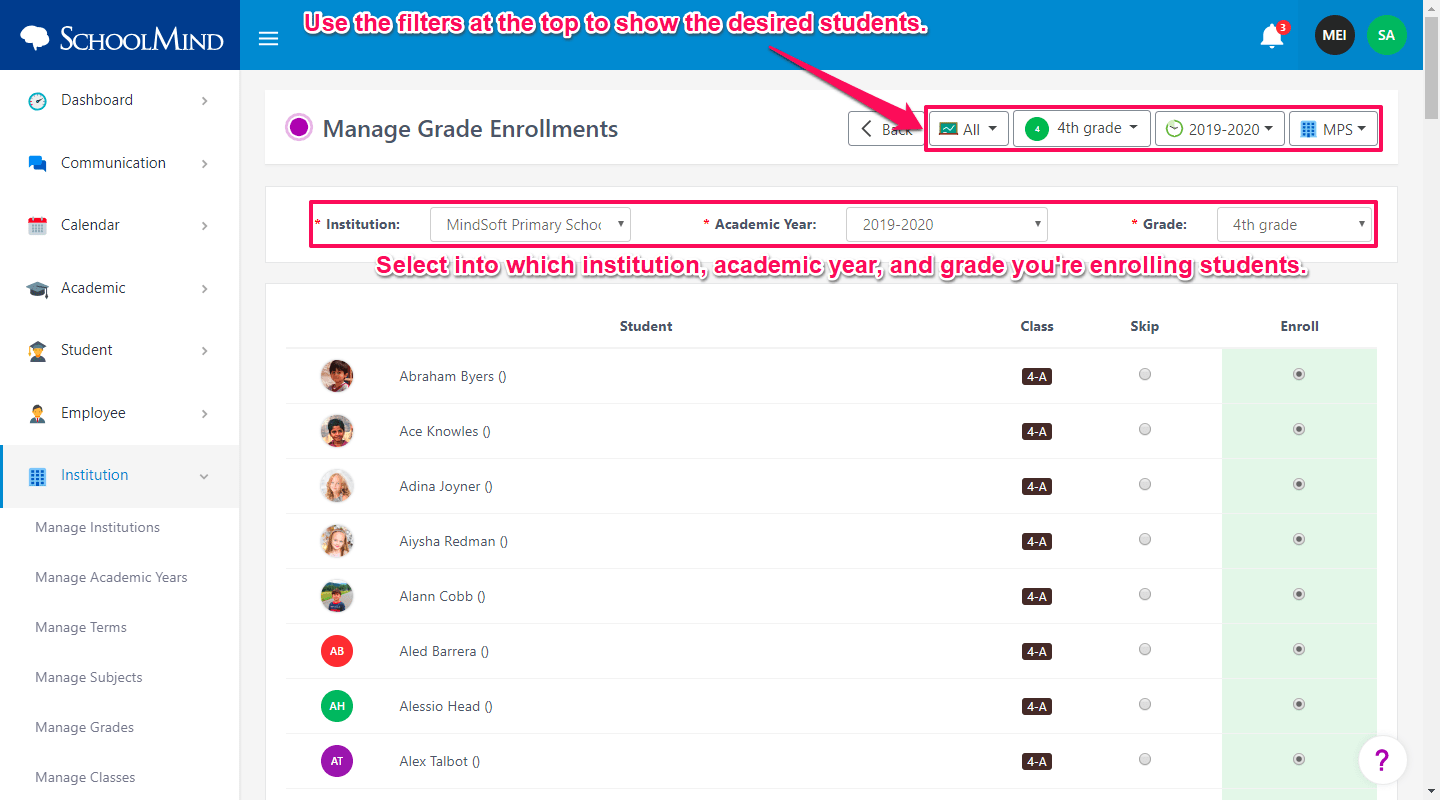
This option is used to enroll students in grades. Usually, it's used for renewing student enrollments when students are moving to a higher grade. Here's how to do that:
1. At the top, use the selectors for the institution, academic year, grade, and class options to filter out the grades (students) you want.
2. Below select the institution, academic year, and grade to which you are enrolling students.
3. Once everything is set, click the Save button.
Managing Class Enrollments
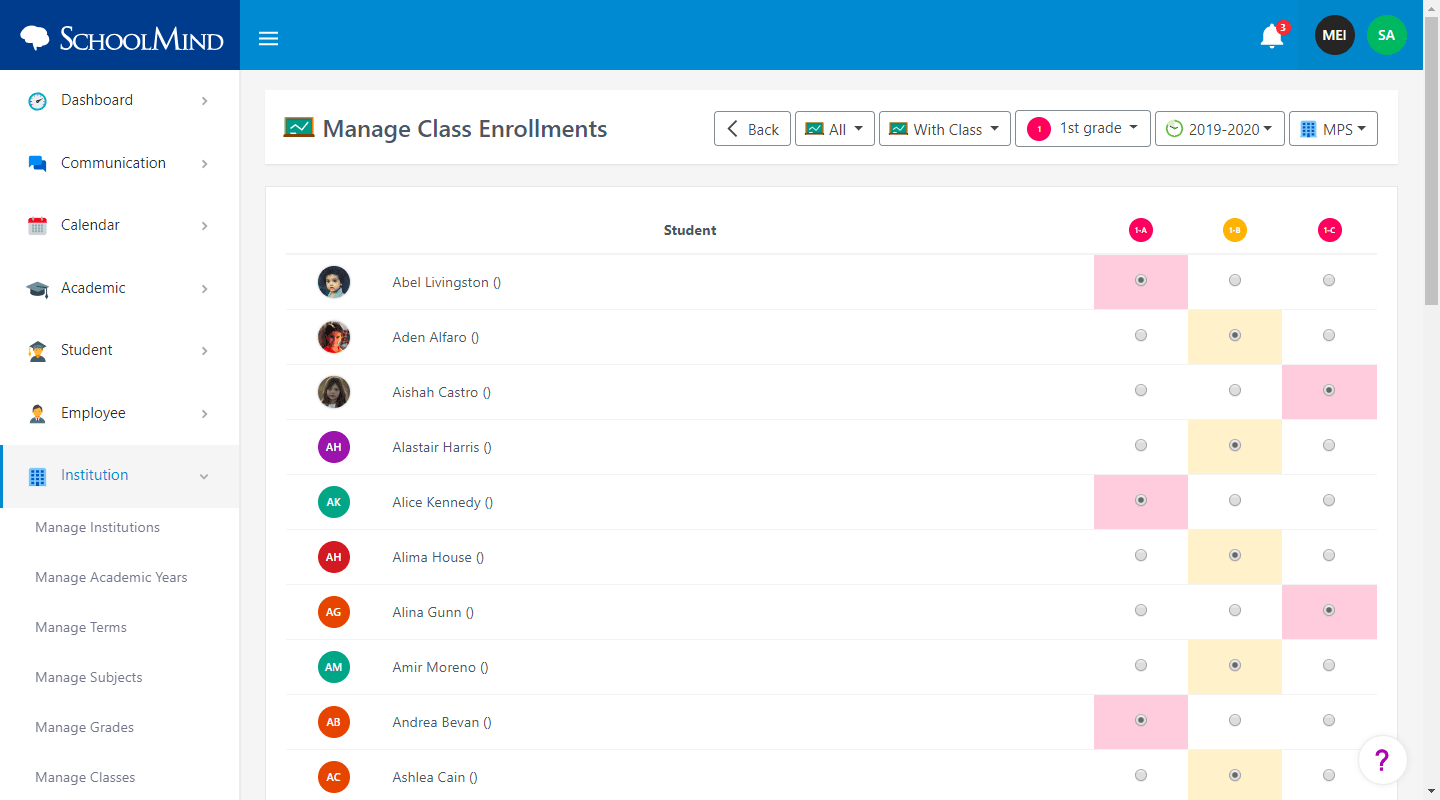
With class enrollments option, it's easy to distribute enrolled students across classes or to move students from class to class.
To distribute students to classes, at the top select the institution, academic year, and grade to view a list of students you will distribute to classes. Then, you can switch between students who have a class and who don't have a class assigned.
1. Students without classes
This is an easy way of distributing students who don't have a class assigned, in bulk.
Figure 1. Distributing students to classes.
2. Students with a class assigned
You can move students who are already a member of a class between different classes.
Figure 1. Distributing students between two different classes.
Figure 2. Distributing students between three different classes.
<p class="sm-help-tag">sm_help_admin_institution_manage_enrollments</p>


Comments
0 comments
Article is closed for comments.