Student profile pictures can be imported in bulk using the Upload Profile Pictures option in the Student module. To import the profile pictures in bulk, you need to set the name of every picture to the corresponding student's System ID number.
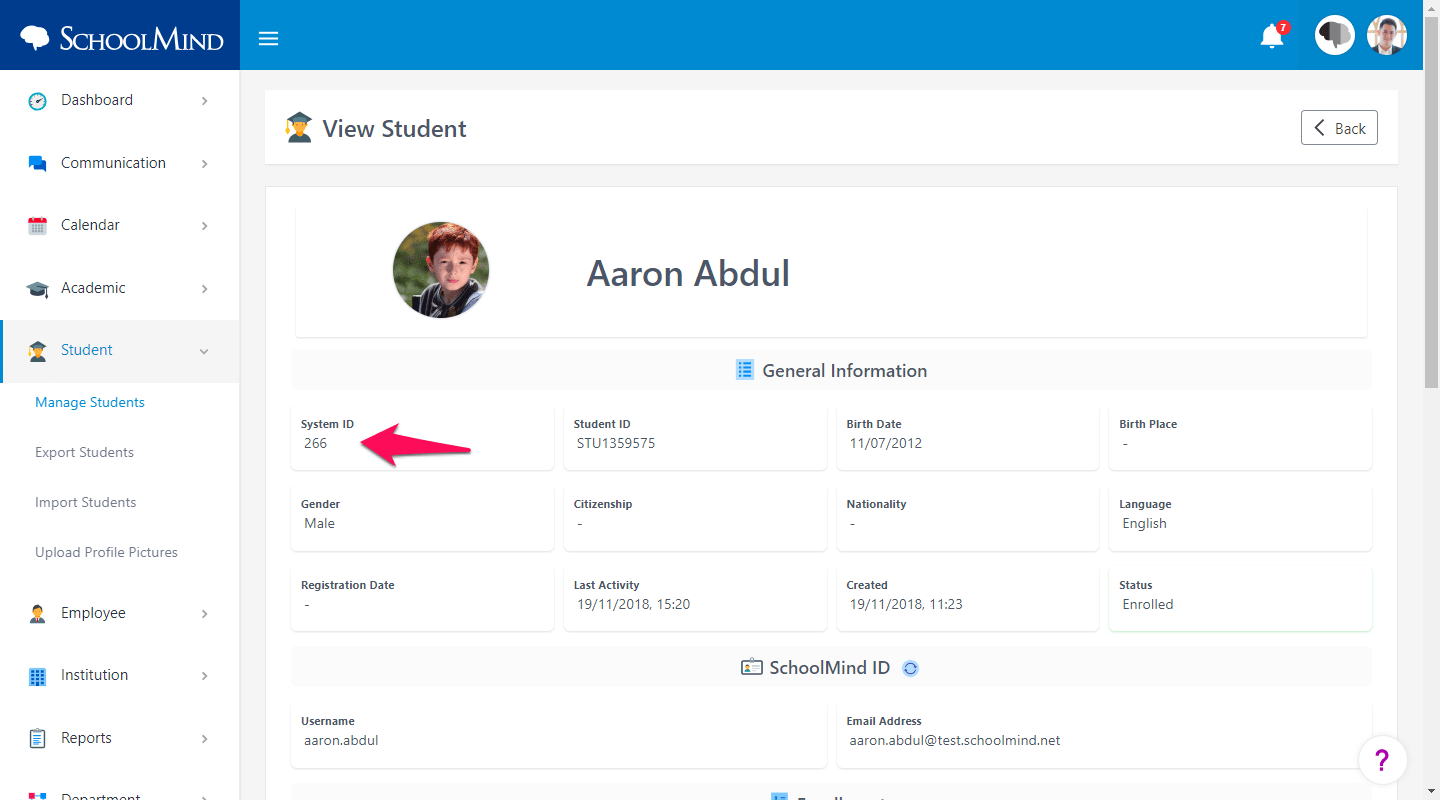
You can find the system ID number in the student profile page. Go to Student > Manage Students > choose a student > View. Under the General Information section, there is a System ID field showing the student's unique system ID.
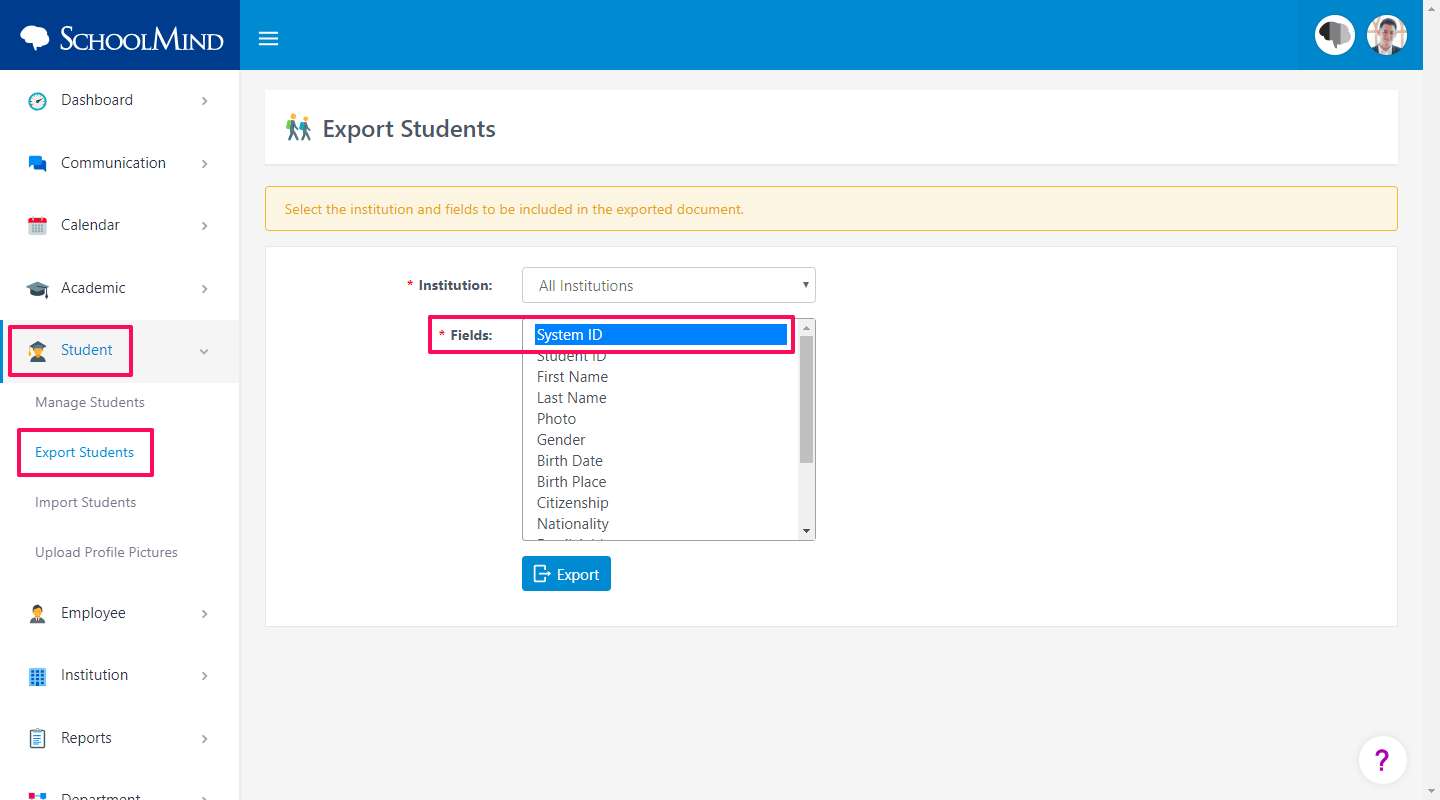
The easiest way to get all system ID numbers would be to export the list of students. To export the list of students, go to Student > Export Students page. Select the relevant institution and, under Field make sure you select the System ID option to be included in the exported file. That way the exported list of students will contain every student's system ID. Click Export button and the list of students will be downloaded on your PC in form of a CSV file.
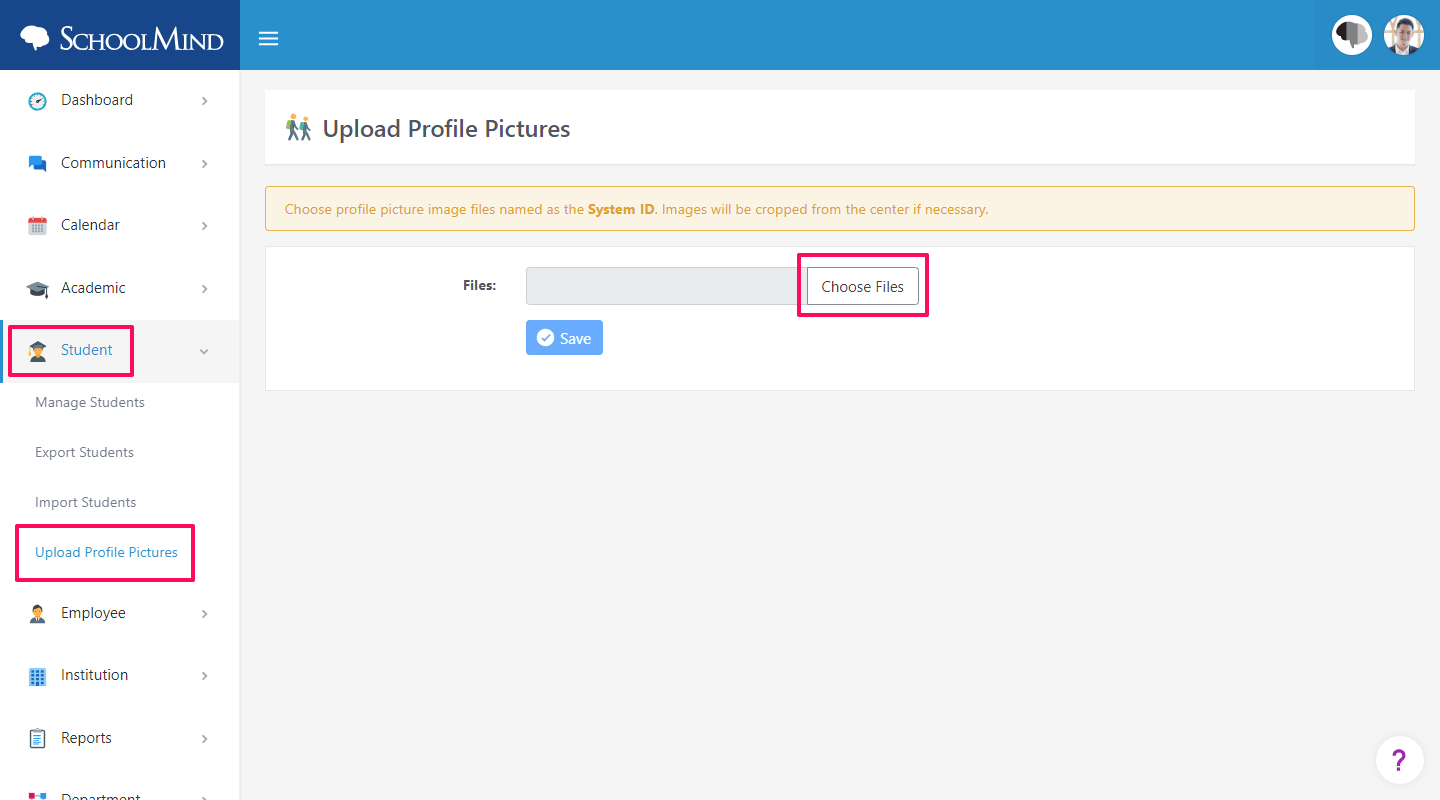
Now rename the student profile photos to match the system ID number of every student. Once you have prepared everything, go to Student > Upload Profile Pictures. From there click Choose Files button and select all the photos you want to import.
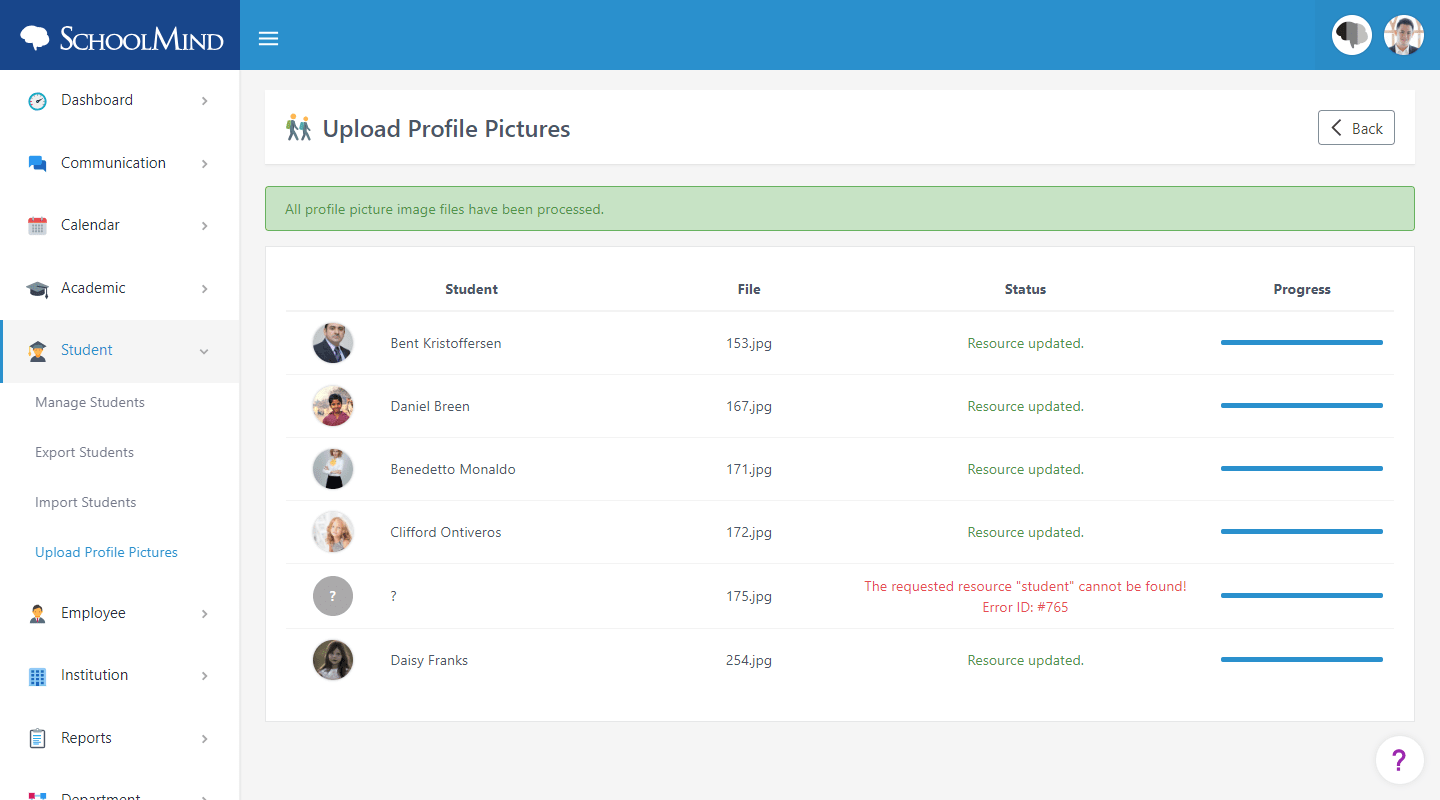
The system will automatically match every photo to the student's system ID number, and set the corresponding profile picture.
Note: All the image processing is done on the browser, so if you have an older (slower) PC, it might hang during the importing process. To avoid this issue, try importing profile pictures in smaller batches or use a more powerful PC.
sm_help_admin_student_manage_students
<p class="sm-help-tag">sm_help_admin_student_upload_profile_pictures</p>


Comments
0 comments
Article is closed for comments.