Adding an employee and sending them an invitation code
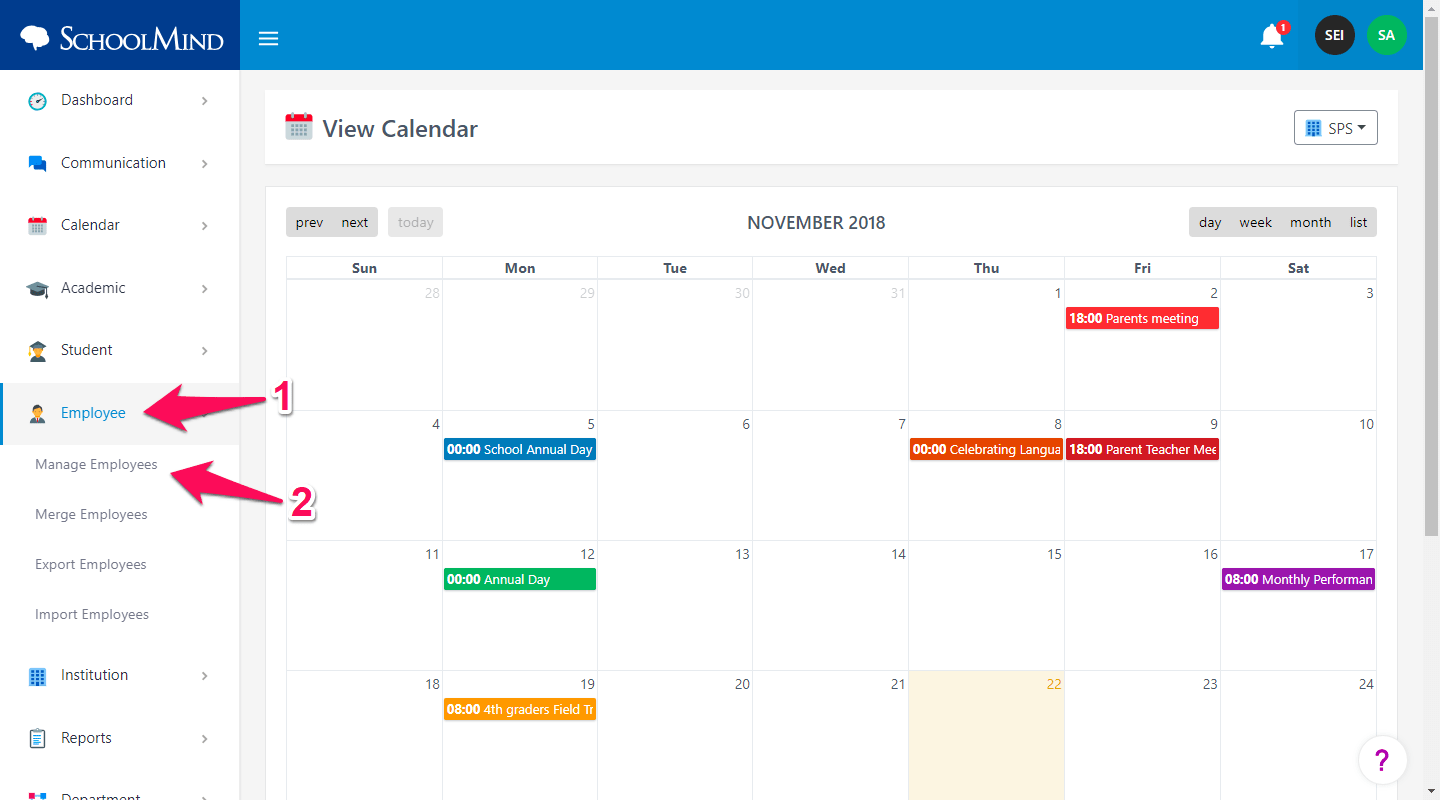
1. On the left-hand side menu, click Employee > Manage Employees.
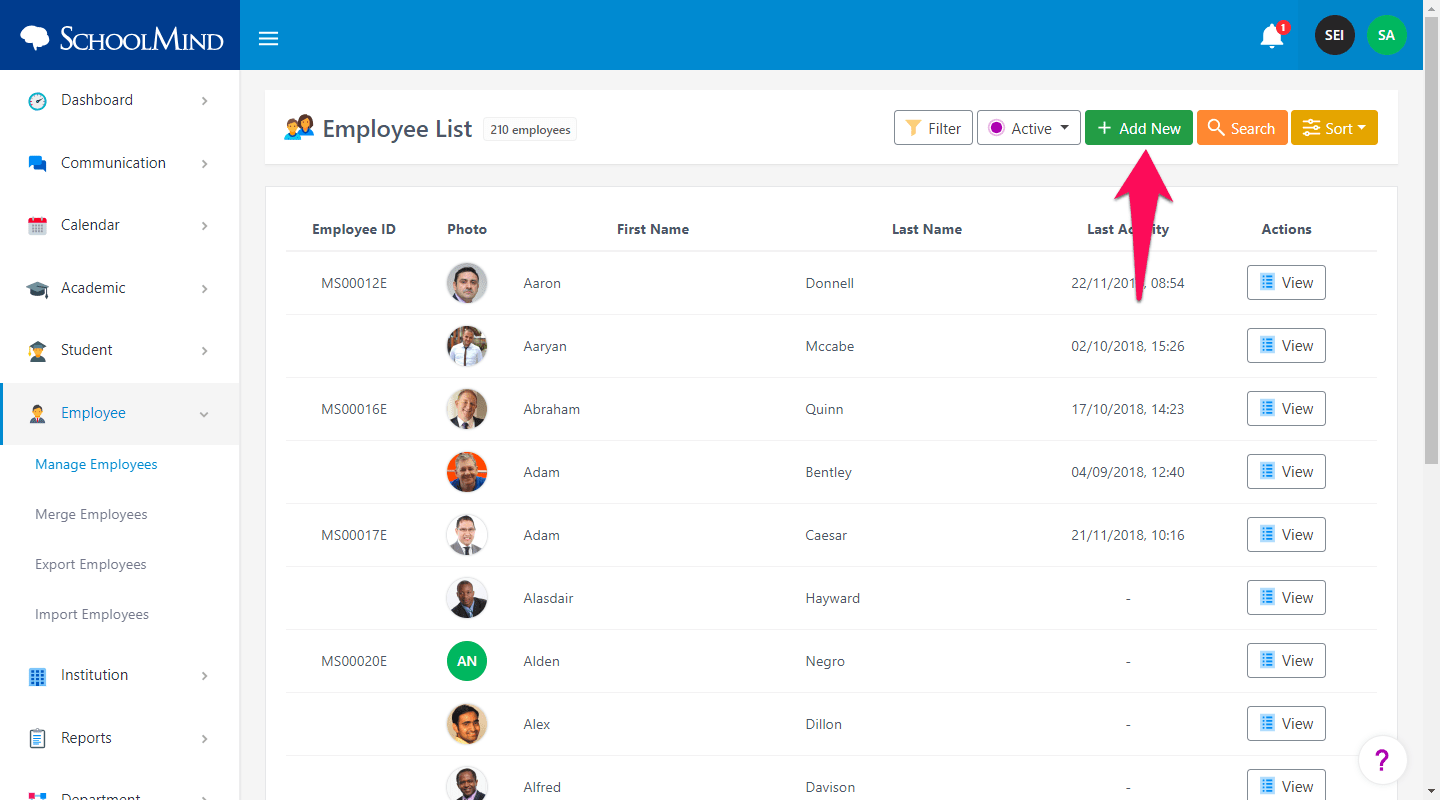
2. In the top right-hand corner, click Add New.
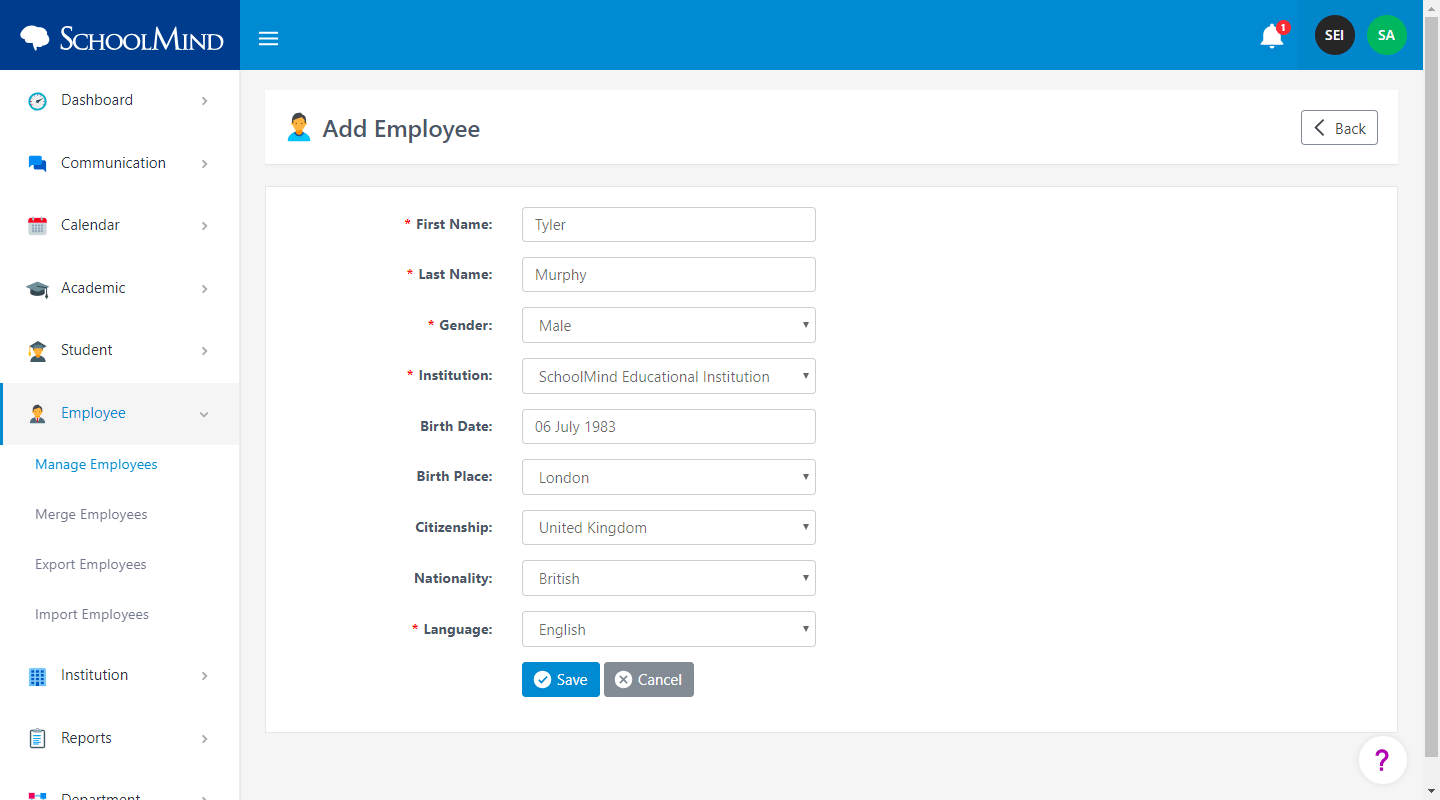
3. Enter employee's information and click Save.
Note: Fields marked with "*" are mandatory.
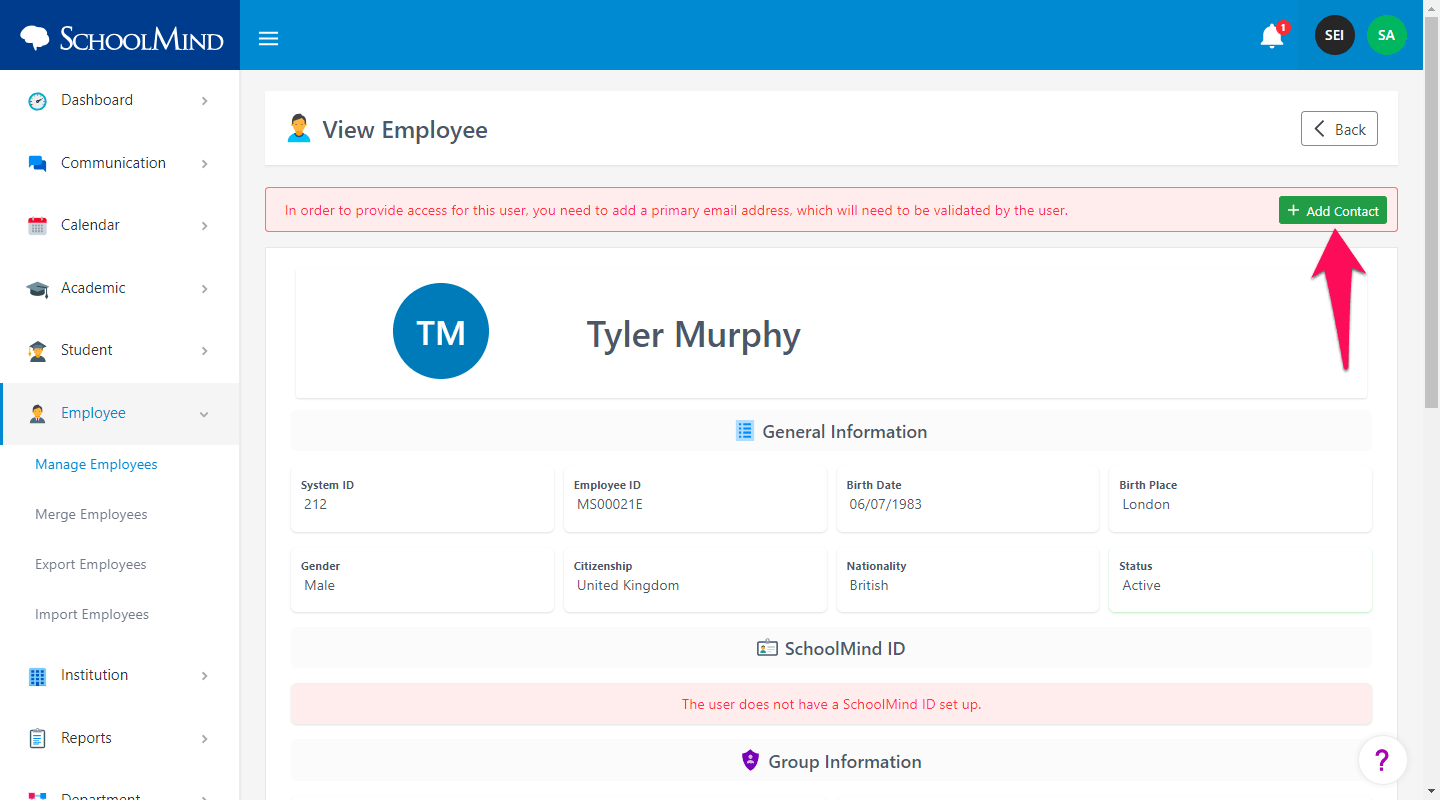
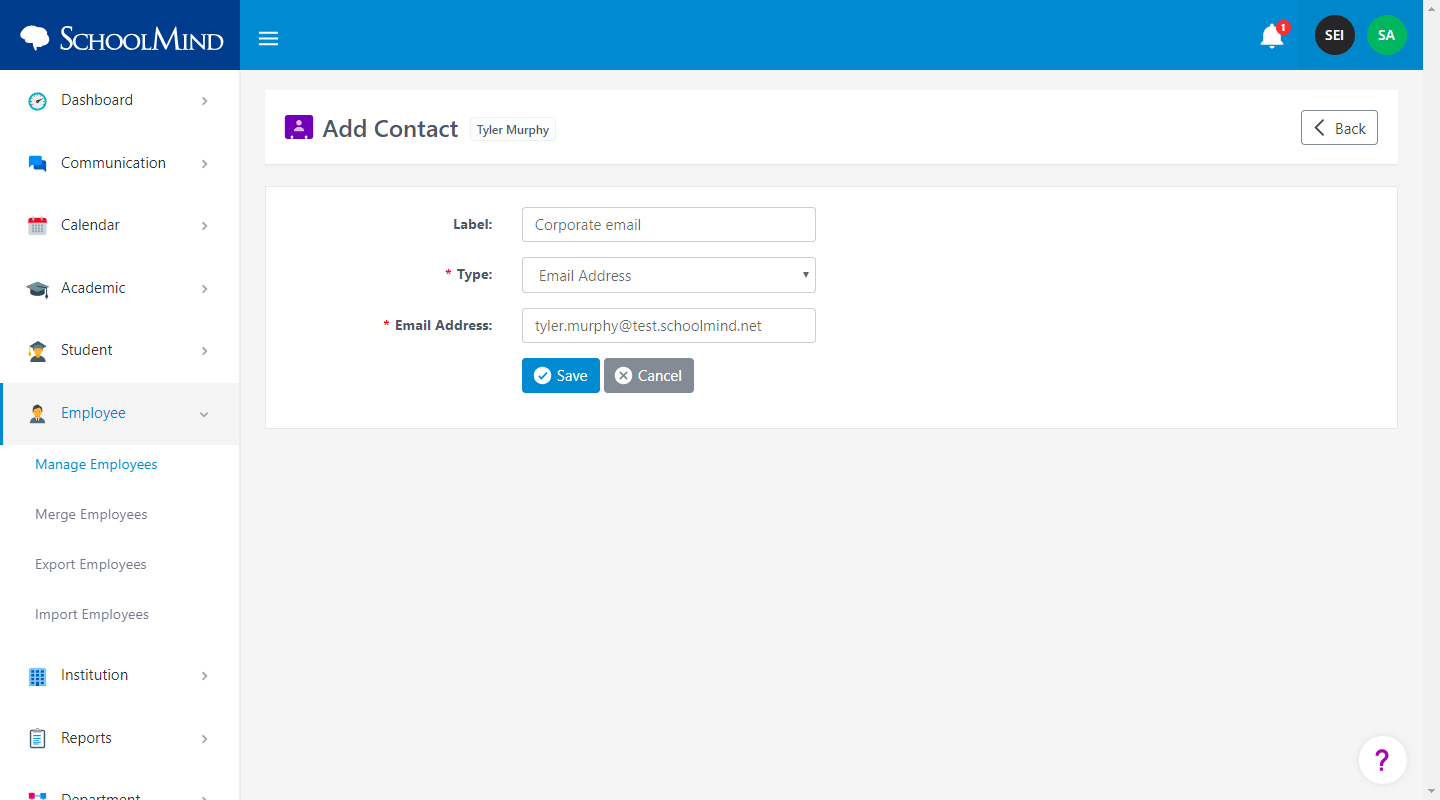
4. Once the employee is added, you need to enter their contact email address in order to send them an invitation code and provide them with access to SchoolMind. Click on the Add Contact button.
5. Enter the employee's email address and click Save.
Once the email address is added, the employee automatically receives an email with the invitation code and instructions on how to create their SchoolMind ID account.
Assigning an employee a permission group
Now you need to add the employee to an adequate Permission Group. When a new employee is added to SchoolMind, they're automatically assigned to a Default Group with which they won't be able to manage things in SchoolMind unless they're assigned as a teacher, class teacher, department manager, or added to some other permission group.
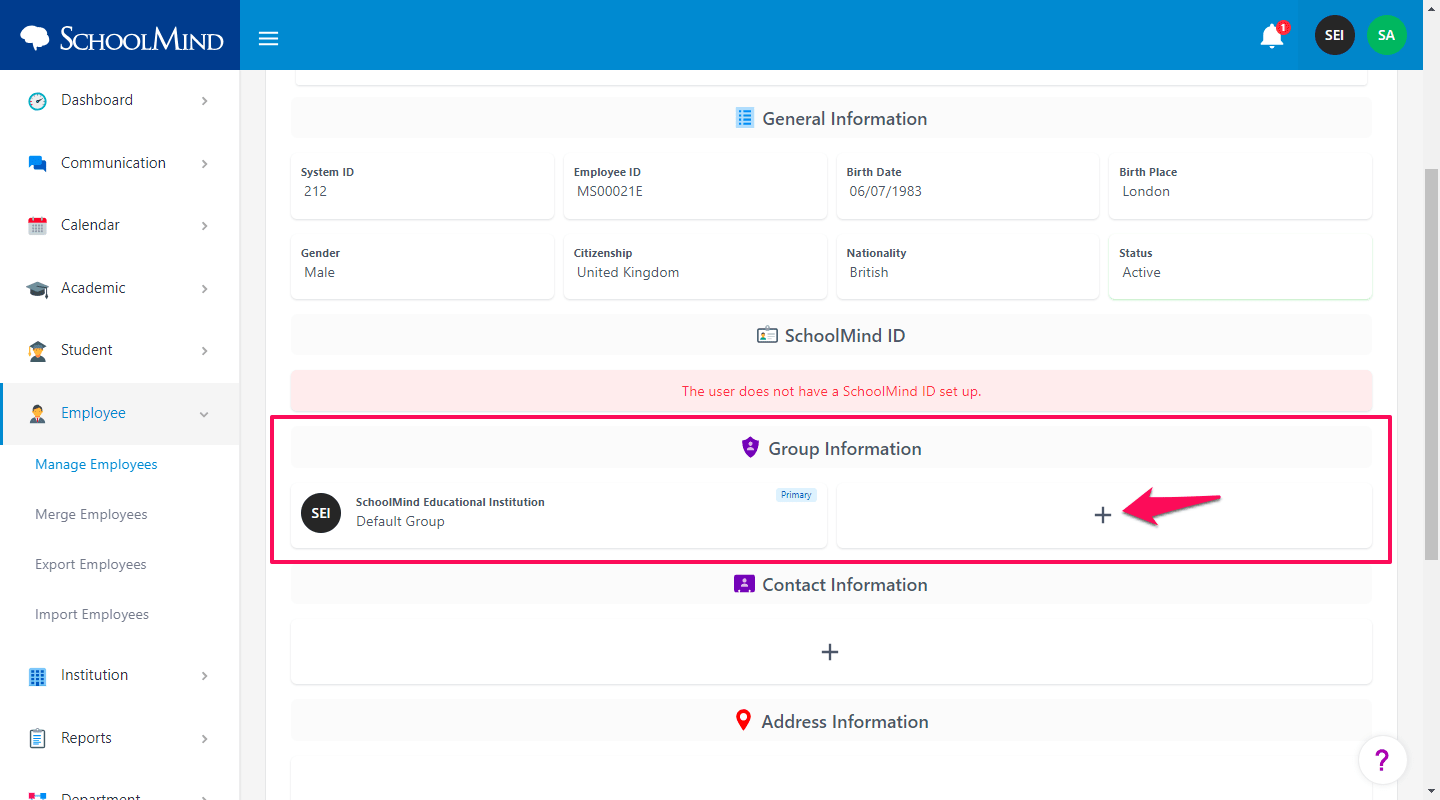
1. In the employee profile page, scroll down and under the Group Information section, click on the "+" icon.
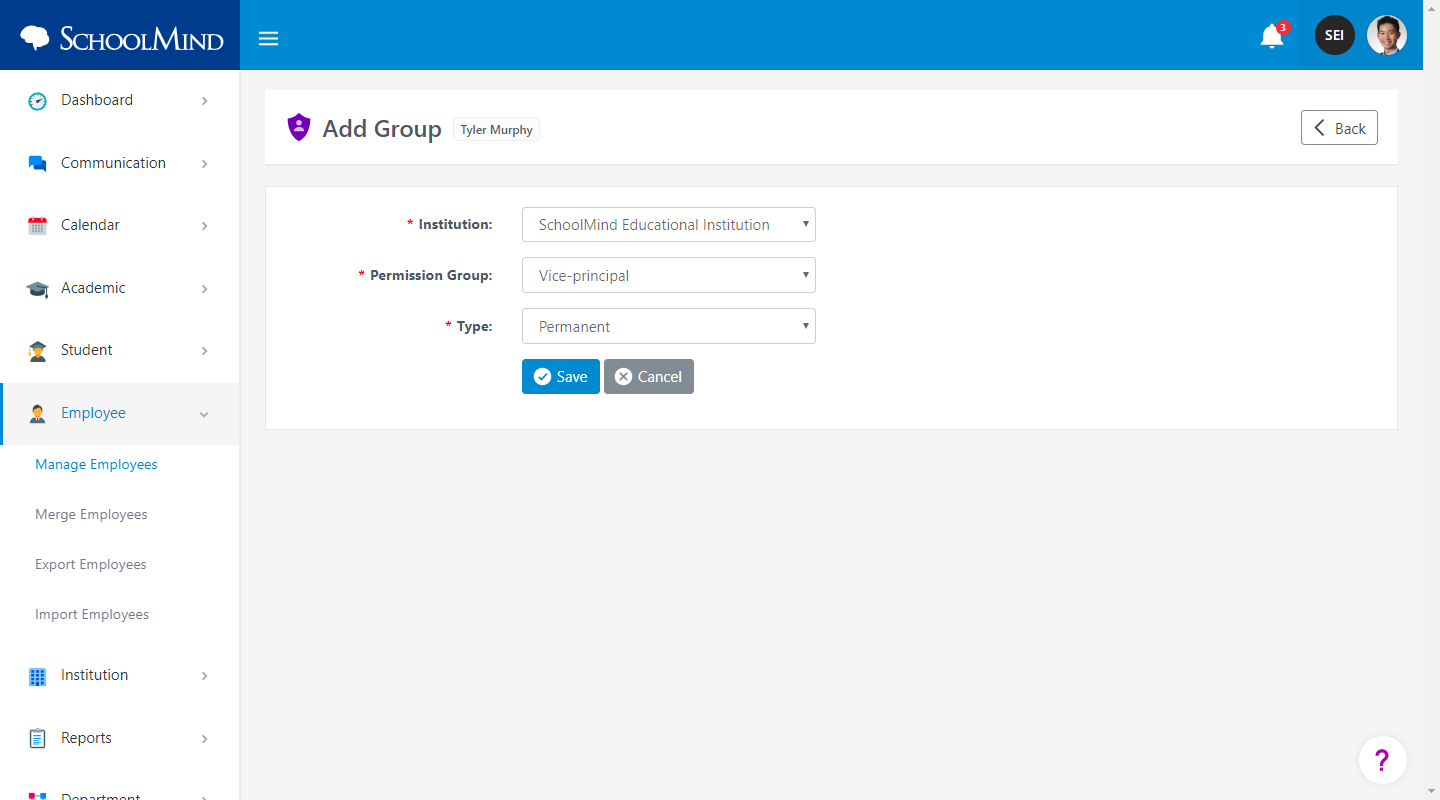
2. Select the appropriate institution, permission group, and click Save.
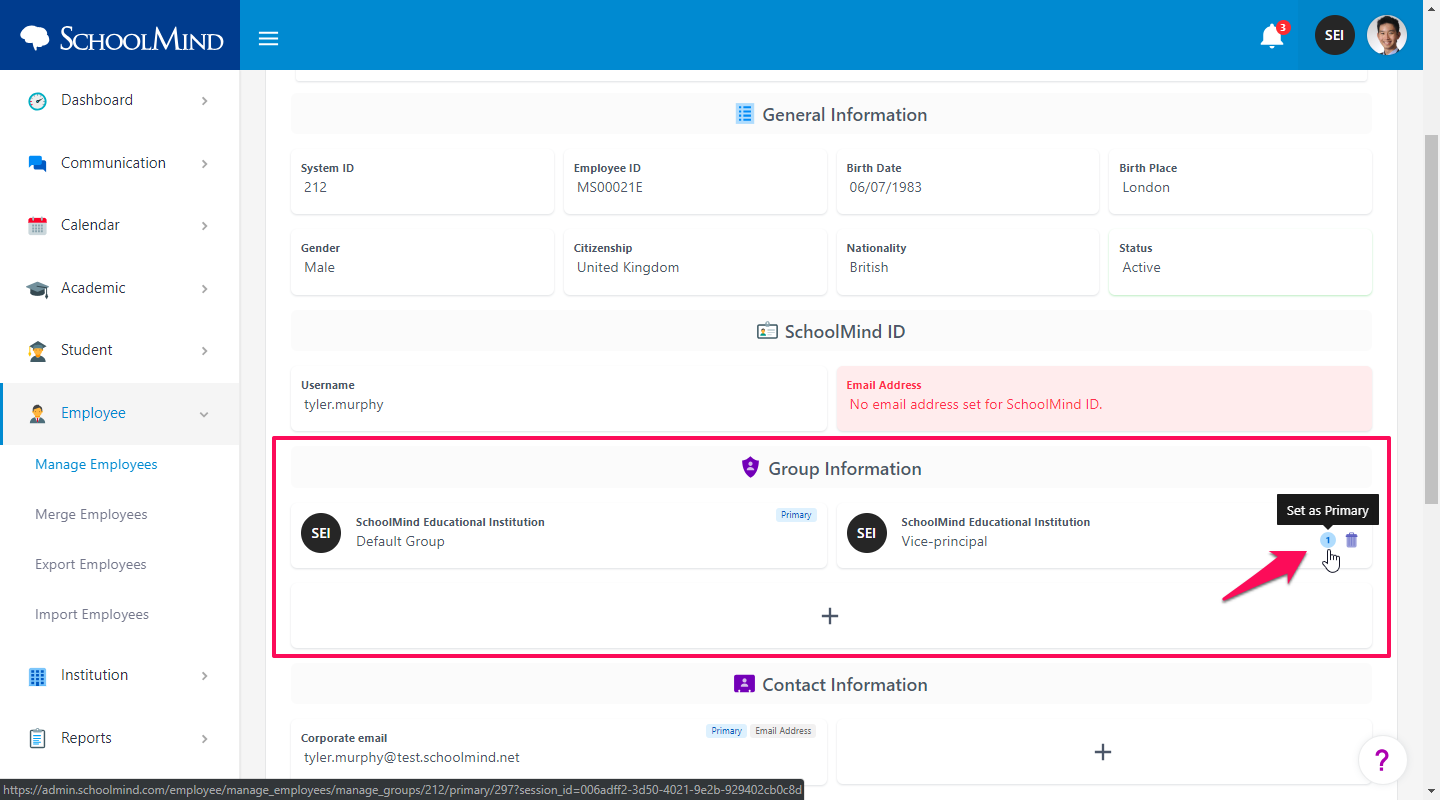
3. Now that the employee is a member of two different permission groups, you need to set the primary group for the employee. Hover with your mouse cursor over the primary icon and click on it to set it as the primary group. Now the employee can access SchoolMind features and options defined by his permission groups.
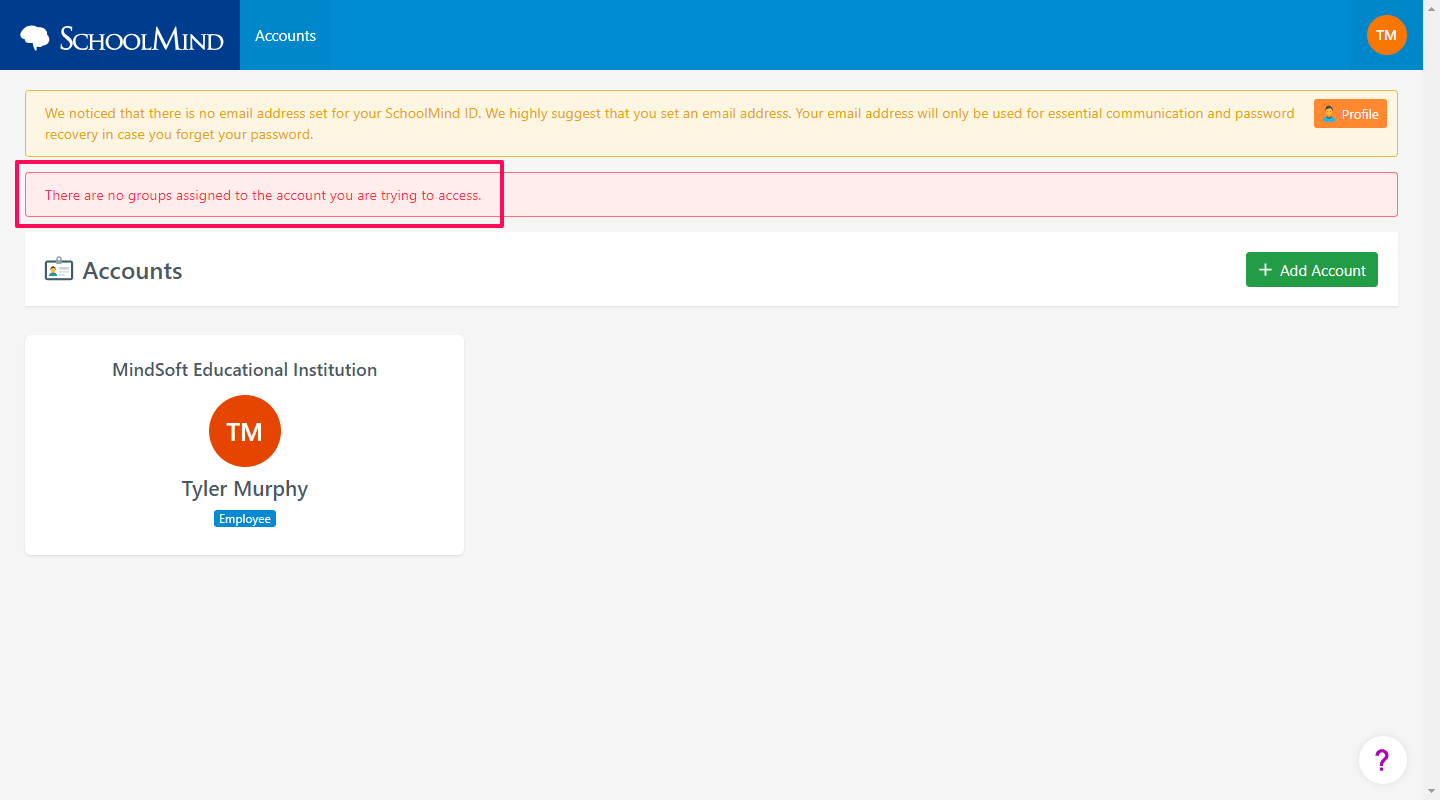
Important note: If you don't assign an employee to adequate permission group, or set the Default Group as his primary group, he won't be able to access SchoolMind in his institution, and will get the following error: "There are no groups assigned to the account you are trying to access."
sm_help_admin_employee_manage_employees

Comments
0 comments
Article is closed for comments.