1. In the left-hand side menu, click "Institution" > "Manage Fixed Mark Templates" > "Add New".
2. Enter the mark template name and click "Save".
3. Click on "Actions" > "Manage Groups". In the top right-hand corner, click on "Add New" and enter the group name.
In this example we're adding two groups (first term and second term).
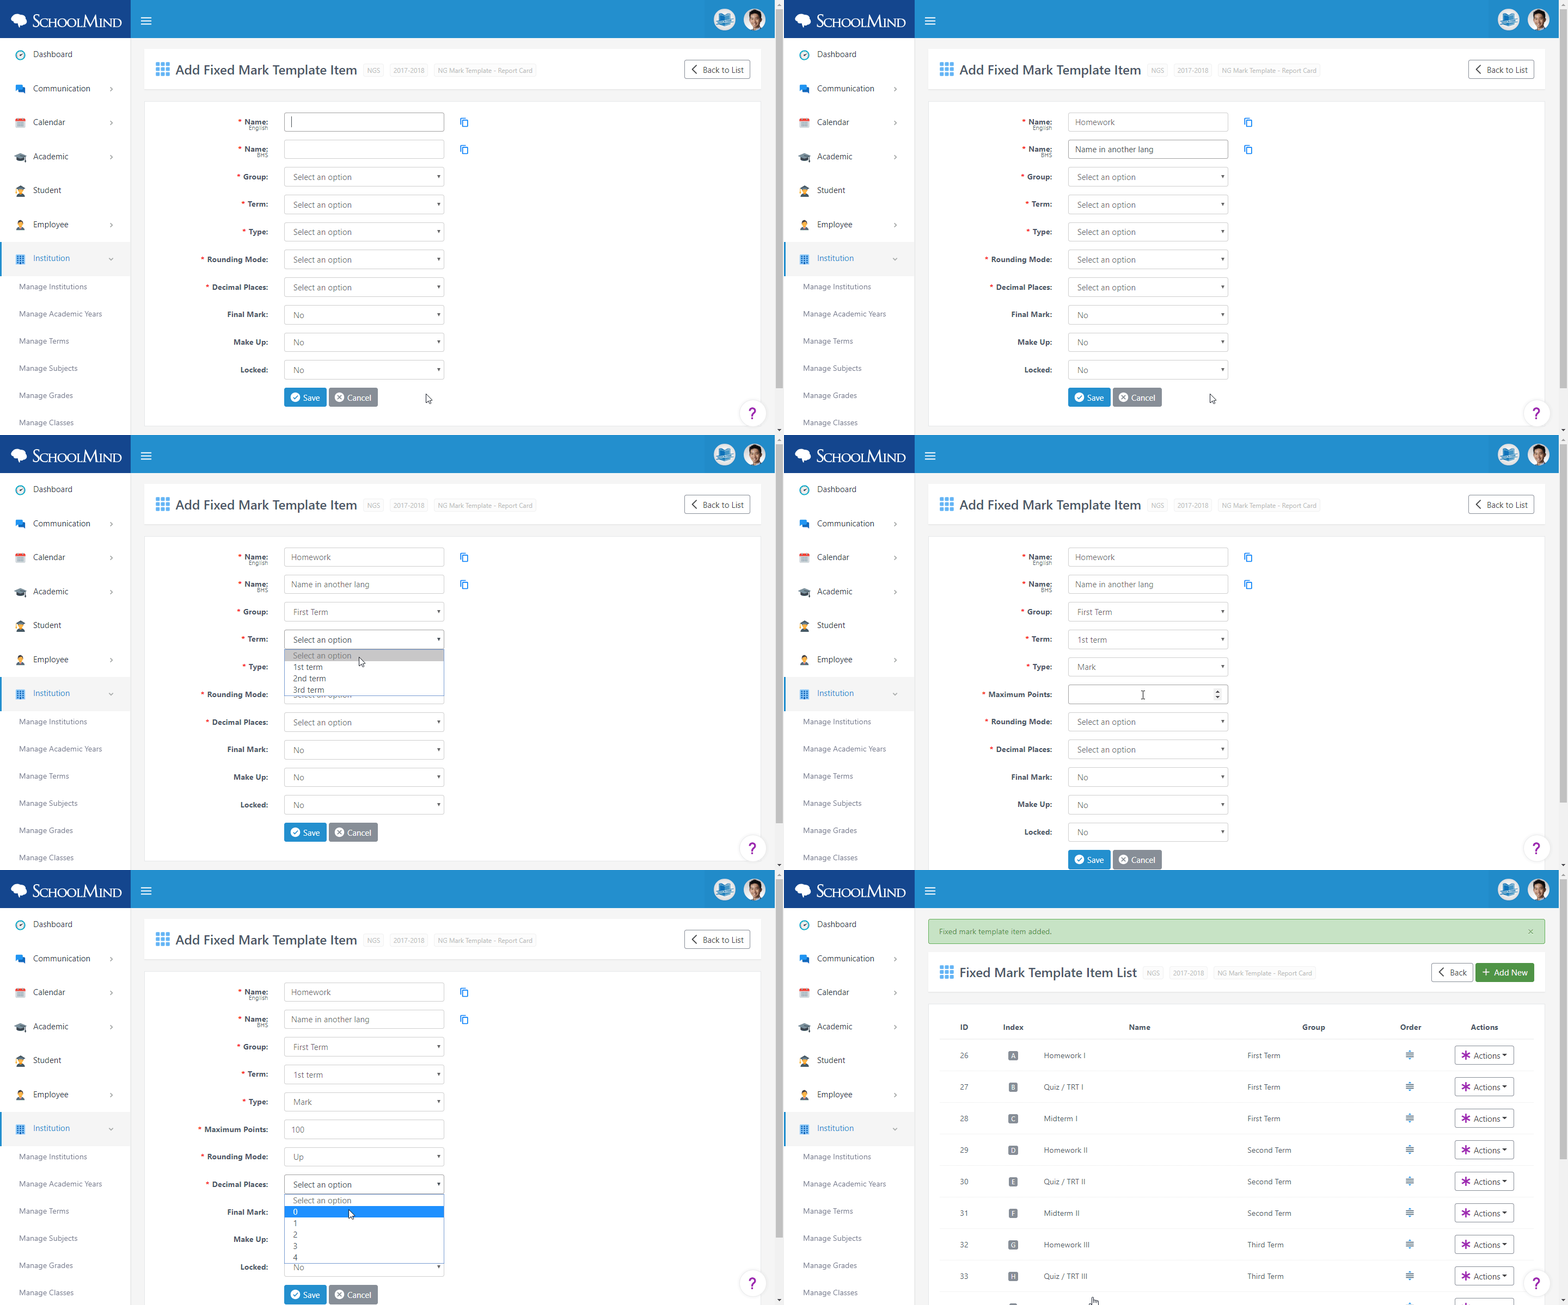
4. After you've added the groups, go back and click "Actions" > "Manage Items". Here you'll add all items which are a condition for a mark (e.g. homework, quiz, exam).
To add a new item, in the top right-hand corner click "Add New", fill in all fields and click "Save". For a better understanding, see the example below.
5. Once you've added all mark items, the mark template is ready for use.
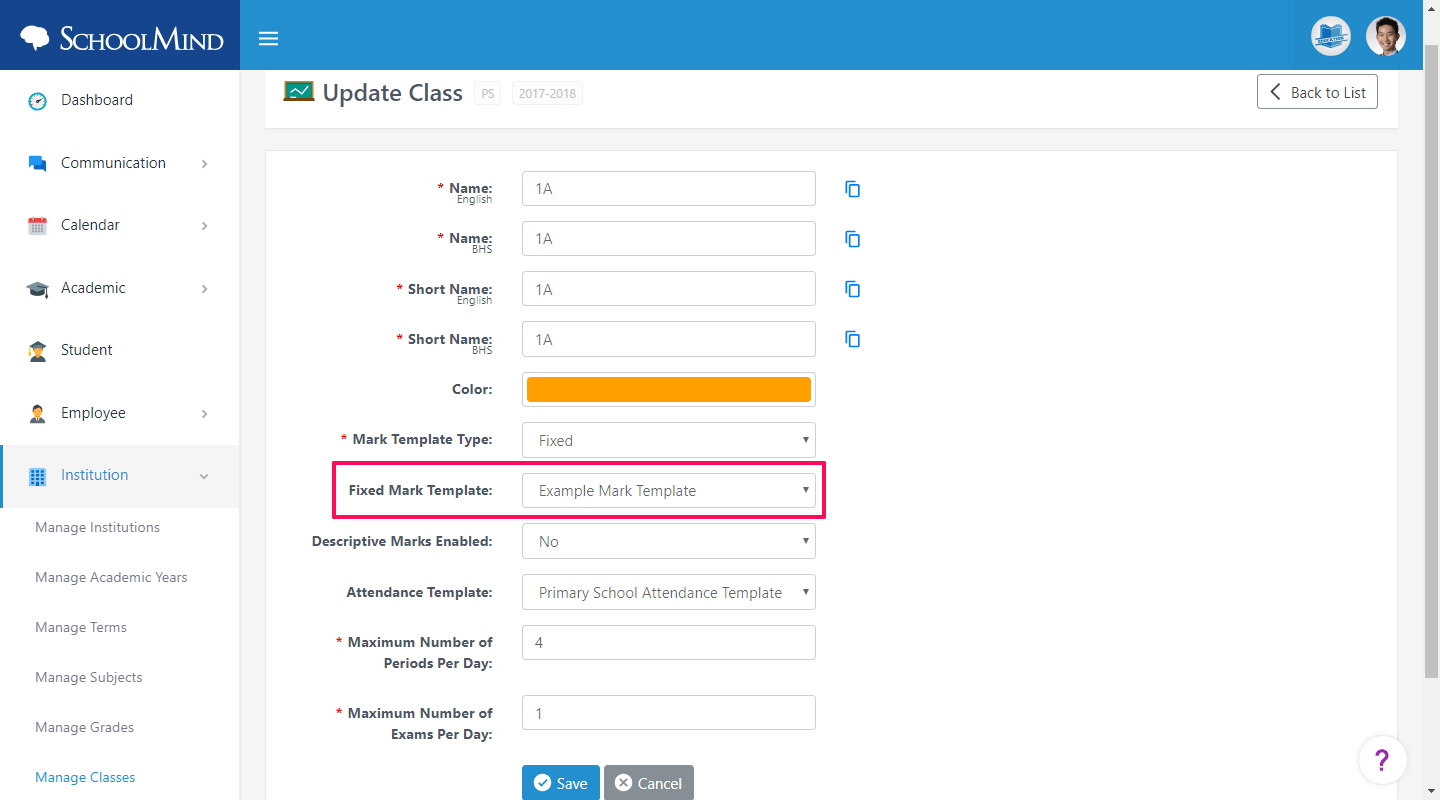
You need to check is the mark template selected to be used for a class. Click on "Institution" > "Manage Classes" > choose a class > click "Actions" > "Update" > under "Fixed Mark Template" select the template you've created previously and click "Save".
sm_help_admin_institution_manage_fixed_mark_templates

Comments
0 comments
Article is closed for comments.