Description
In this article, we'll show how to import a timetable which was created in aSc TimeTables program into SchoolMind. Please read and follow the article instructions carefully.
In short, this is how the process goes:
Getting it done
To create the timetable in aSc TimeTables and import it to SchoolMind, do the following:
1. Install aSc TimeTables program on your PC.
Note: The least supported version of aSc TimeTables is v2013.7.2. Check your aSc TimeTables version by clicking Help > Info.
2. Right-click the link below and select "Save link as..." option to download the schoolmind-export-sheme.xml file to your PC.
Download this file by right-clicking and selecting Save As... schoolmind-export-sheme.xml
3. Copy schoolmind-export-sheme.xml file to C:\TimeTables\template\xmlexport.
Note: You need to do this only once after installing aSc TimeTables. If you have aSc TimeTables already opened, please restart the program in order to see "SchoolMind export configuration" option in the export menu.
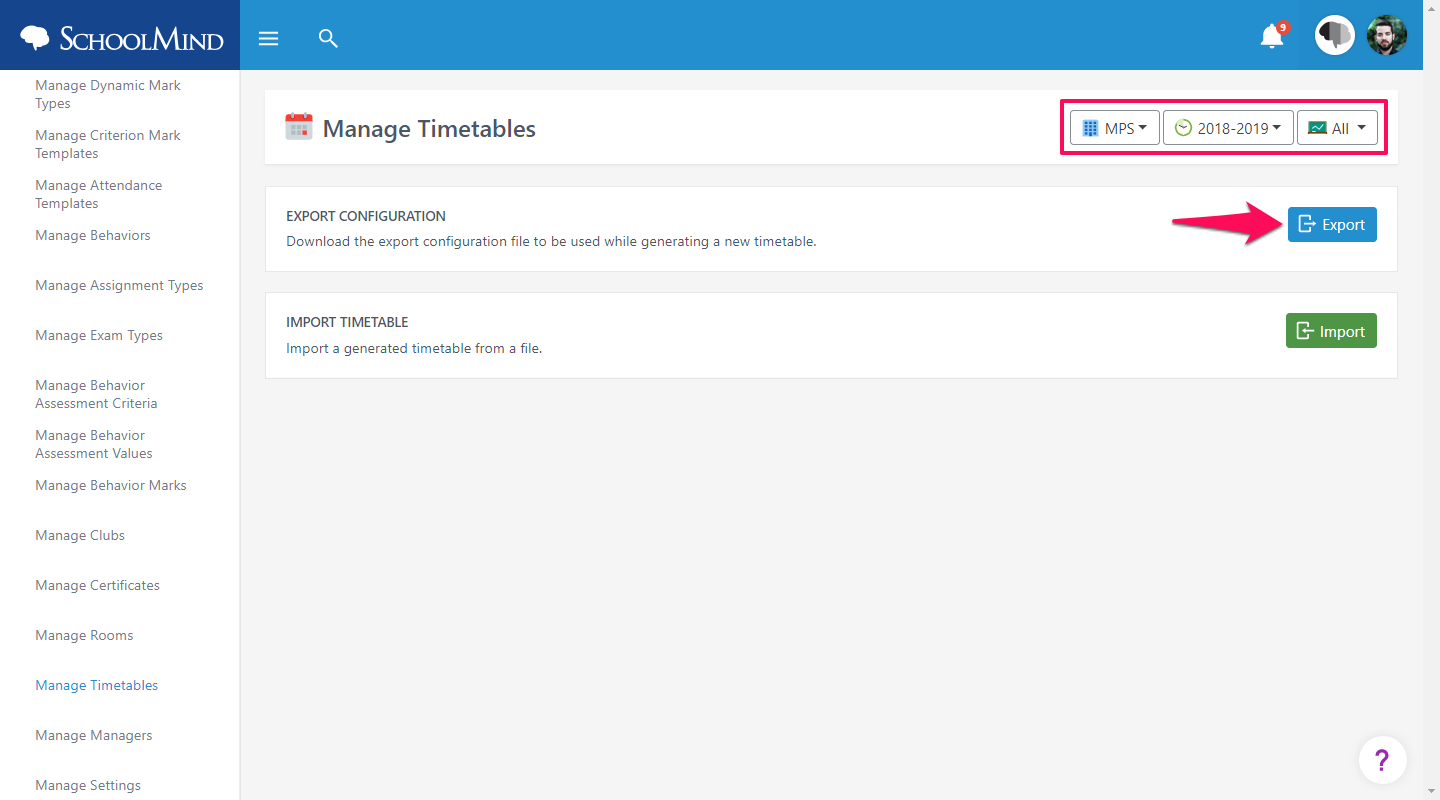
4. Navigate to Institution > Manage Timetables section in SchoolMind.
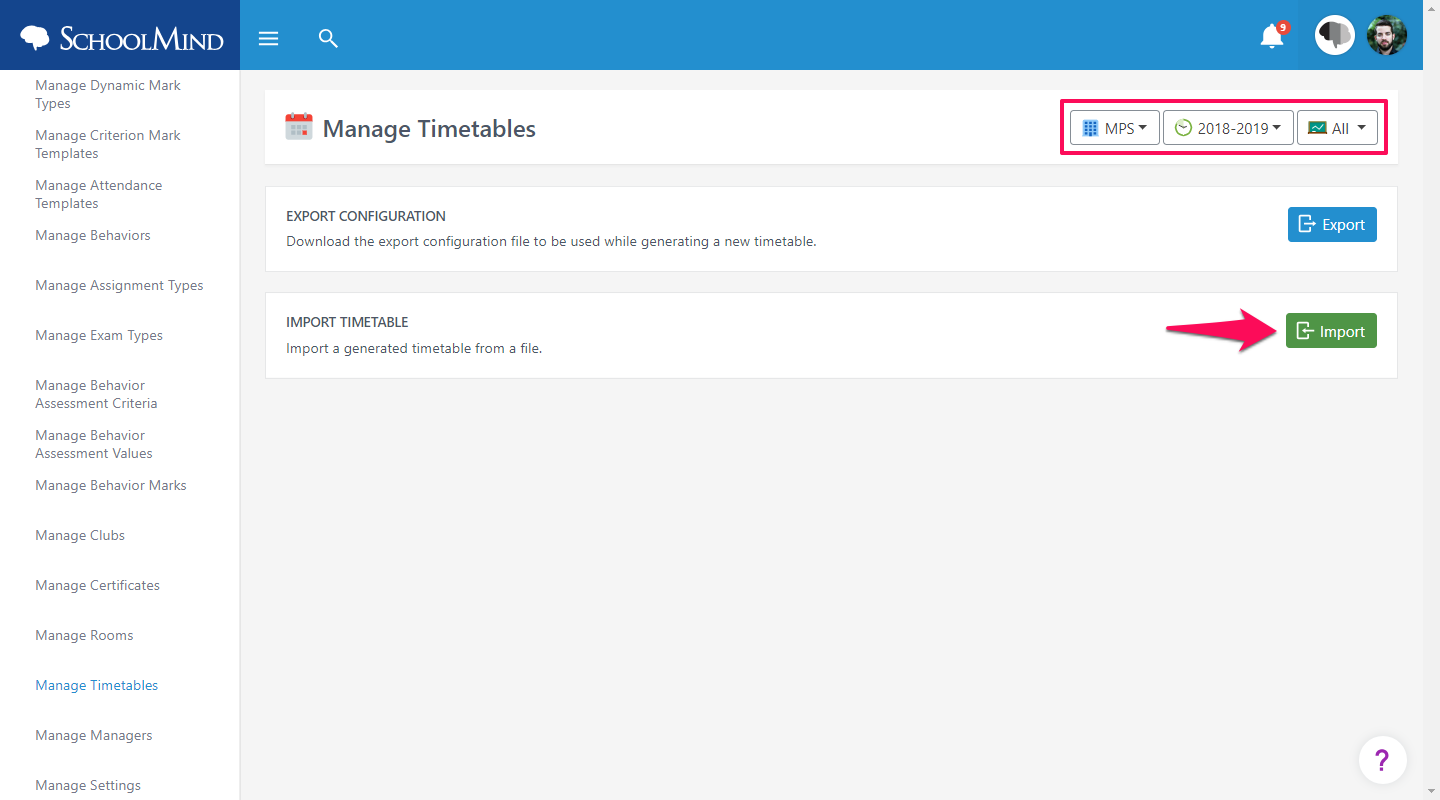
5. Select the institution and academic year for which you will be creating the timetable in aSc TimeTables program.
Note: If you're creating a timetable for all classes, then select the "All Classes" option.
6. Download the timetable.xml file from SchoolMind by clicking on the Export button.

7. Open the aSc TimeTables and click Main > New.
8. When the timetable Wizard starts, click Next and enter/edit only the following information:
- School name
- Academic year
- Periods per day
- Number of days
- Weekend
- Uncheck "Work with zero periods"
9. Click Next, skip all other steps and click Finish.
Note: Do not add subjects, classes, classrooms, or teachers using the timetable Wizard or there will be an error later during the import process. You already have this information in the file you've exported from SchoolMind.
10. Now import the timetable.xml file you downloaded from SchoolMind. In aSc TimeTables click File > Import > aSc Timetables XML.

11. Locate the timetable.xml file on your PC > click Open.
12. The Wizard will open; continue by clicking OK on both windows.
Note: Do not make any adjustments here.

13. Now using drag and drop create a timetable according to your preferences. Or, quickly generate a random timetable by navigating to Timetable > Generate new > Start timetable generation.
IMPORTANT!
Keep in mind the following while creating an aSc TimeTable:
Allowed actions:
- Manage constraints for a teacher
- Manage time offs for a teacher
- Manage lesson numbers and times
- Automatically generate timetables
- Validate timetables
- Match lessons and classrooms
Forbidden actions:
- Add/Delete/Edit a teacher
- Add/Delete/Edit subjects
- Add/Delete/Edit classrooms
- Add/Delete/Edit classes
- Add/Delete/Edit subject-teacher relations
Note: If you need to make any of the forbidden operations mentioned above, do not make them in aSc TimeTables. First, make the changes in SchoolMind then re-import the timetable.xml file to aSc TimeTables. Otherwise, the import to SchoolMind will fail!
14. After you have created the timetable, export it from aSc TimeTables and import it to SchoolMind. In aSc TimeTables, click File > Export > SchoolMind export configuration > enter the timetable file name, and click Save.
Note: If you don't see "SchoolMind export configuration" in the list, please check Step 3. of this manual.
15. In SchoolMind, navigate to Institution > Manage Timetables. Select the institution and academic year for which you're importing the timetable and click Import.

16. Enter the timetable name, select start and end date, select a class, choose the XML file you previously exported from aSc TimeTables, and click Save. The timetable is imported.
17. If everything was done properly, the timetable will be imported, and you'll get a success message.
Tip: When done with the import, save the .roz file from aSc TimeTables on your PC as you might need it for possible future updates to the timetable. To save the file, click Main > Save > Save as > enter the file name > click Save.
Possible issues
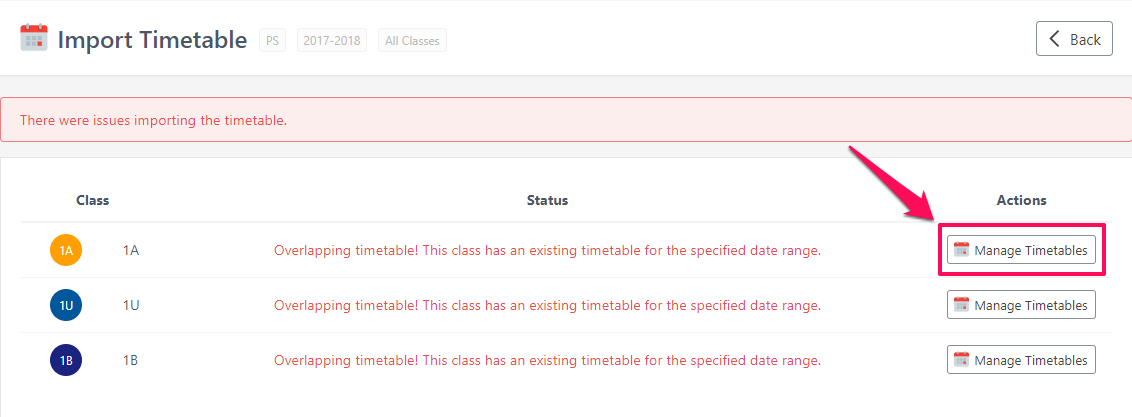
If there is already a timetable with the same start and end date, an error will occur and the import will fail. The reason for this is because the time periods are overlapping.
To fix that, click Manage Timetables button, change the start and end date (or remove the old timetable), and re-import the timetable again.
Note: When importing timetables for all classes, and the import fails only for one class, the import will fail for other classes as well. In order for the import to be successful, the status of all classes needs to be "Class timetable is valid".
Here's a video showing how to import the timetable to SchoolMind:
<p class="sm-help-tag">sm_help_admin_institution_manage_timetables</p>


Comments
0 comments
Article is closed for comments.